|
The Sample Registration form explained gets bulky and browser unfriendly when too many Samples are attempted at once. Consider bulk importing Samples per spreadsheet
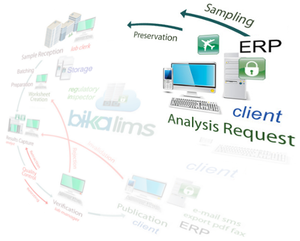
Client Users DIY
Client Contacts registered as LIMS users may register Samples for analysis themselves but often need an incentive. Please make them aware of the faster turnaround achieved
As per manual convention, we assume on this page the user is authorised to execute the actions described, either as clientcontact or labclerk
Same as for Batches
Batching Samples is recommended if you receive many of them at a the same time from Clients. They are also useful to group Samples per work order, project or experiment
Creating Samples here on the Client's list is the same as for creating them in Batches
 Video. Sample registration in Batches Video. Sample registration in Batches
Registering Samples
In the ideal world, Clients do these themselves remotely. In real life it requires some coaching and incentive. Mostly thus by Labclerks, either before Sampling, or at Sample Receipt
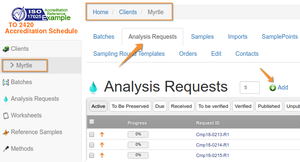
Navigate to the Client's Samples, or Batch to be used, and click [+Add] after setting the number you want
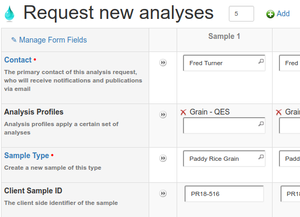
Proceed as per Sample registration outlined in the Batching chapter
 Results for the Sample will be published to the Client Contact selected, colleagues configured to be cc'd, per their publication preferences Results for the Sample will be published to the Client Contact selected, colleagues configured to be cc'd, per their publication preferences
 Sample Type is compulsory as it is frequently used in Sample and IDs Sample Type is compulsory as it is frequently used in Sample and IDs
 With the Sample Point Location add-on* installed, users can capture both the Location, a village or building, and the actual Sample Point there for say water samples With the Sample Point Location add-on* installed, users can capture both the Location, a village or building, and the actual Sample Point there for say water samples
* senaite.samplepointlocations
To speed up the process, use preconfigured Analysis Profiles to complete the selection of Analyses required, useful if the same collection of Analyses is often requested together
Using Sample registration Templates, will also complete Sample Point and Type fields
Copying Samples
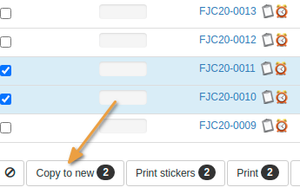
Another quick way to create a Sample is to copy an existing one. Select the Samples to be copied on Sample list and click [Copy to new]
The Sample registration form opens with a column per Sample copied which inherits the originals' Contact, Sample Type, Sample Type, Date Sampled, Specification and Analyses selected for inclusion
|
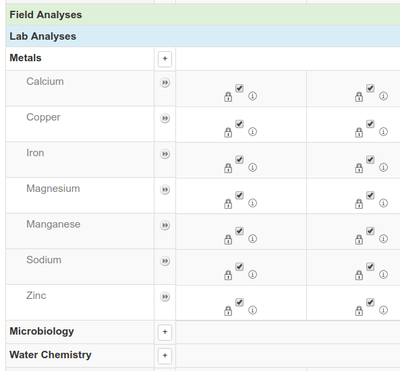
Analyses manually
if an Analysis Profile or Sample Template was used, Analyses for the Samples are auto selected, else add them manually. Click on the Field or Lab Analyses header rows
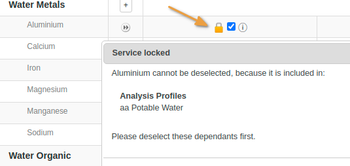
Locked Analyses
When a locked icon is displayed next to an Analysis, it was included using an Analysis Profile, and it cannot be removed without removing the Profile first. Click on the icon to see by which Profile it is locked
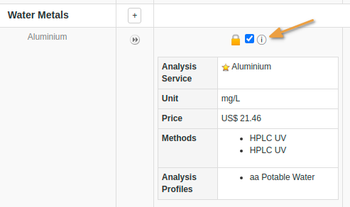
Analysis information
Click on the information icon i, to see more information about an Analysis for which space could not be found on the form itself, Method, Unit, Price and Profile
Cost
If the LIMS was configured for a commercial lab, price information will also be displayed and totalled. If it was the Client itself requesting the analysis, they in fact agree to the price when they submit the form
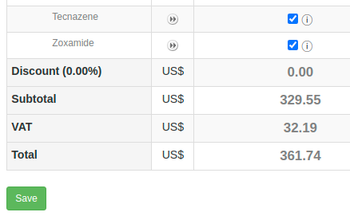
Click [Save]
Barcode labeling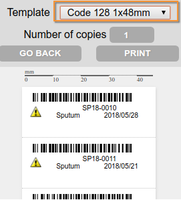
If configured for auto sticker printing at Sample registration, the new Samples' bar codes will be presented for printing, e.g. the ID barcode; text Sample ID, Sample Type, Date Sampled
Alternatively, stickers can be auto printed when Samples are Received in the LIMS, or not at all
More Information at Receiving and Labeling Samples
Registration form cluttered?
Configure it with only the Sample attributes you really need
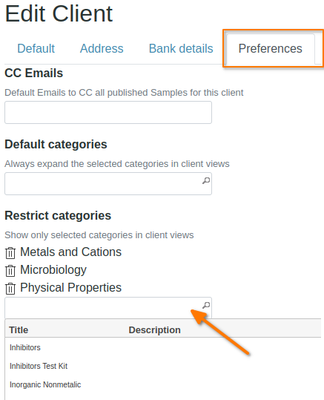
If you have many different Analysis Categories, it is likely some Clients never request analyses from some of them. Restrict these Clients to specific Categories on its Edit -> Preferences page
|
Samples registered and listed
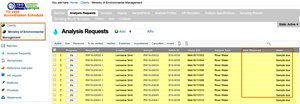
The user is returned to the Client's Sample lists, listing the Samples in To be Sampled state, else with Sampling disabled, as Sample due
Columns to be displayed can be configure by users too, Display columns. Screen preferences
If the system was configured to print containers stickers for Sampling, this would've happened at Sample registration here. For this use case they are printed at Sample Reception
Sample due view
Authorised users may continue to edit the Sample attributes on its view page
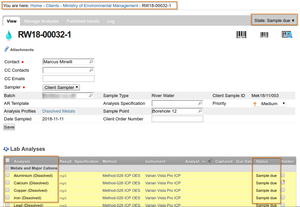
Add or Remove Analyses
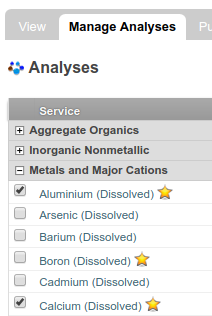
More Analyses may be added to Samples at any time pre verification, on its Manage Analyses tab
 Register Samples as Received Register Samples as Received
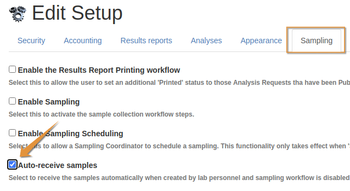
If all the lab's Samples are registered at lab reception when they arrive, the initial Due state for Samples registered by Clients remotely, is redundant and Bika can be configured to start the Samples off as Received, which will save time
Clients may still register Samples remotely, and they will be Due until checked in at the lab as Received
The configuration takes place on the Sampling tab of global Bika Setup pages
 Immediate Results Entry Immediate Results Entry
With this option enabled in the setup, the user lands on the Samples' view immediately to capture any field results, or other use cases, available already

|


