13.1 Creating Worksheets
Disclaimer |
|
|
13.1.1 Create Worksheets from Sample listsPer Batch or Client, from Sample lists Templates are easier...Note that most of the manual process described here, can be simplified through the use of pre-configured Worksheet templates that automates the process, useful as time savers when Worksheets tend to have the same lay-outs
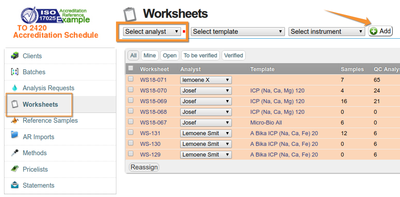
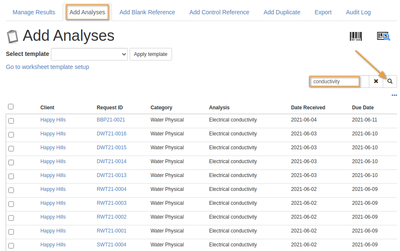
Worksheet AnalysesBe sure to have enough Analyses available in the system to fill a worksheet with. Analyses available for assignment to Worksheets, have to be in Received state and not assigned to other WSs already Creating a WorksheetSelect the Worksheet Analyst, compulsory, and click the add button. The LIMS returns all available analyses - whose samples were received, have no results captured yet and not assigned to other worksheets already The user may narrow the list down using to specific Analyses to add by using the Search function. Bika returns all available analyses within the search criteria, sorted by due date in Priority, the most urgent at the top Creating a Worksheet for a specific Instrument, limits the Analyses for assignment to those configured for the selected instrument
|
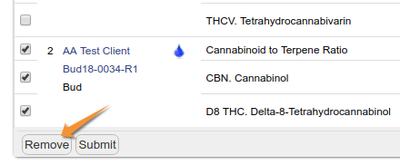
Select Analyses to be included and click on Assign, the topmost check box selects all. Once selected, an [Assign] button is displayed at the bottom of the sheet, click it. The worksheet is then created with unique sequence number and the selected analyses assigned The Analyses' originating Analysis Requests are hyper linked from their IDs and can be browsed to view the analysis in Sample context. On Sample views, these analyses display an assigned icon hyper-link to the Worksheet More Analyses can be added from the Add Analyses tab at the top and the steps repeated. Analyses are removed from the worksheet by selecting them and clicking the Remove button
|
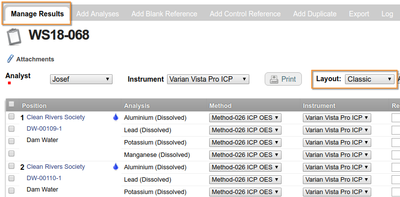
Capture results to a WSWhen the Worksheet is ready and populated with the routine Samples and Controls required, in status 'open', results for the Analyses can be captured For manual data capturing at benches far from Bika terminals, analysts may print worksheets to record results and captured into the system later
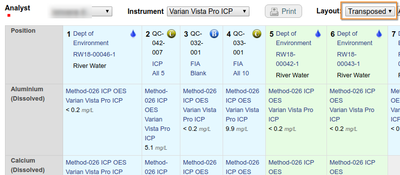
and switch between Classic view with Sample per row, and Transposed, per column The worksheet may be exported to any of the lab instrument import formats available in the system - this will produce a text file of sample IDs, tray positions and analyses requested that can be imported by the corresponding instrument to improve turn around time and also accuracy by eliminating opportunities for transcription errors Result data produced by the instruments may also be uploaded directly if the system is configured to read it's export files Upload Attachments to the WorksheetThe Worksheet data capture form also allows for file attachments, such as microscope images, to be uploaded for individual analyses or the Worksheet as a whole
|

