Building and Using Analysis Profiles and Sample Templates
This is one of the most powerful time-saving features in Bika LIMS. Once you master these two tools, registering samples becomes dramatically easier in labs that run the same test packages repeatedly. Tutorial
Analysis Profiles
Sometimes also called an analysis selection Panel or Mask
Profiles are collections of Analyses frequently ordered together. By storing the collection of analyses in a profile, these can be re-ordered for many samples through one click instead of having to select all the analyses one by one
Profiles can have their own prices, often used as promotional tools, and are very good for Client facing LIMS
Sample (Registration) Templates
A Sample registration tool like Analysis Profiles, but in addition to Analyses requested, may also include defaults for Sample Point, Sample Type and Sample Partitions, Aliquots, which each has its own Analyses assigned - a full sample creation preset
Works well for internal workflow speed & consistency, eg. always having to partition water samples for 1) Chemical analysis, and 2) Microbiology, partitioned and preserved individually
Setting up an Analysis Profile
Manual
Navigate to Analysis Profiles in the Setup

Click the [Add] button

On the New profile's Default page, give the new Profile a name and unique Keyword that'll be used in results imports
For the Tutorial we use Metals for both
Set the Sample Types for which the Profile must be offered for selection on Sample forms
On the Profile's Analyses tab, select which ones to include. Here we use Lead and Mercury only

If you are in a commercial lab, the Profile can also be used to price a Metals offer by the lab. Select the corresponding check box and capture a price
The Commercial ID is used in Interface exports to accounting systems

Save the Profile
It will now be available on the Sample Create form for Selection
Setting up a Sample template
Configured the same way as Profiles but has an extra Partitions tab where auto partitions can be set up and and Analyse assigned per individual Partition or Aliquot
Use Case: For this tutorial we are going to set up a Sample template to facilitate automatically partitioning a Sea Water Sample on receipt:
- Chemistry partition for metals testing, Lead and Mercury
- MicroBio aliquot for the detection of Faecal Coliforms
Navigate to Sample templates in the Setup

Click [Add]

Sample Templates are often set up per Sample point for recurring sampling there. We select Bikini Beach as Sample Point for collection Sea Water Samples
We call the template Bikini Beach Daily, to make it easy to find
Check the appropriate boxes if it will be a Composite Sample collected by the Lab
NB Because the next tab can be tricky, it is best to [Save] first before continuing
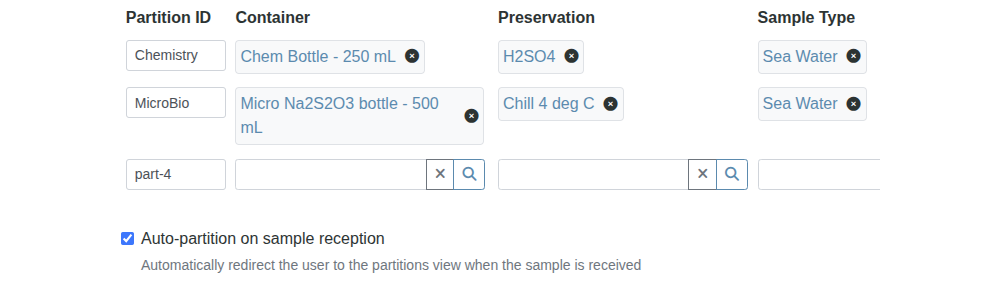
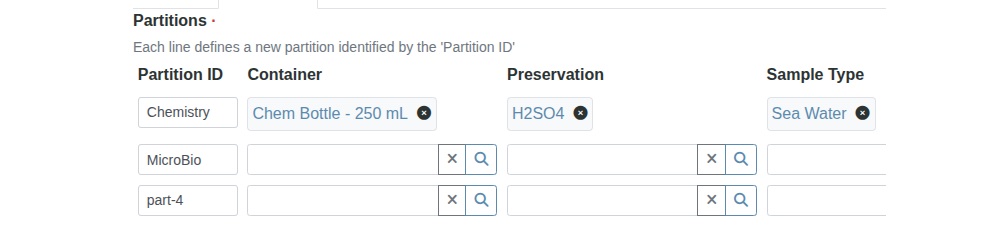
The Partitions tab
We set the partitions up as desired. All fields except the IDs are optional. In this case here we went for the full house
Secondary rows open as soon as you start typing on the current row
Here we call the two Partitions Chemistry and MicroBio
In some cases, e.g. DNA extraction, the partitions become new Sample Types. Here they both stay Sea Water
Select Auto-partition if that is how you are going to use the template - The Partitions will be automatically created when the Sample is received
NB Save the tab
Ignore the empty Partition row
Under certain conditions - that's why we save the page frequently - the partitions are not fully committed - re-open the Template, check the Partition tab and if necessary, plug the gaps and save it again
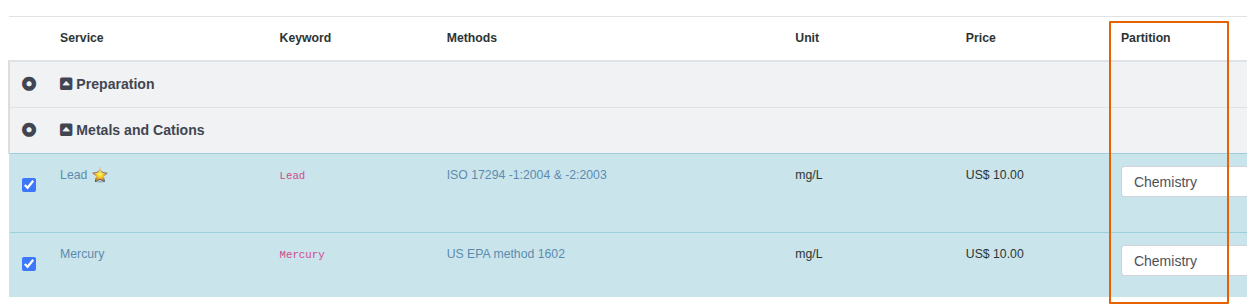
The Analyses tab
Similar to Profiles' - select the Analyses to be included and assign them to the correct Partition in the corresponding column
- Chemistry with the Metals Lead and Mercury assigned to it
- and MicroBio with Faecal Coliforms assigned to it
Using the Sample template
On the Sample Create page, select Bikini Beach Daily as Sample template
The Sample Type and Point fields will autocomplete
The Lead, Mercury and Faecal Coliforms are selected as Analyses for the Sample. More can be added
Press [Save]
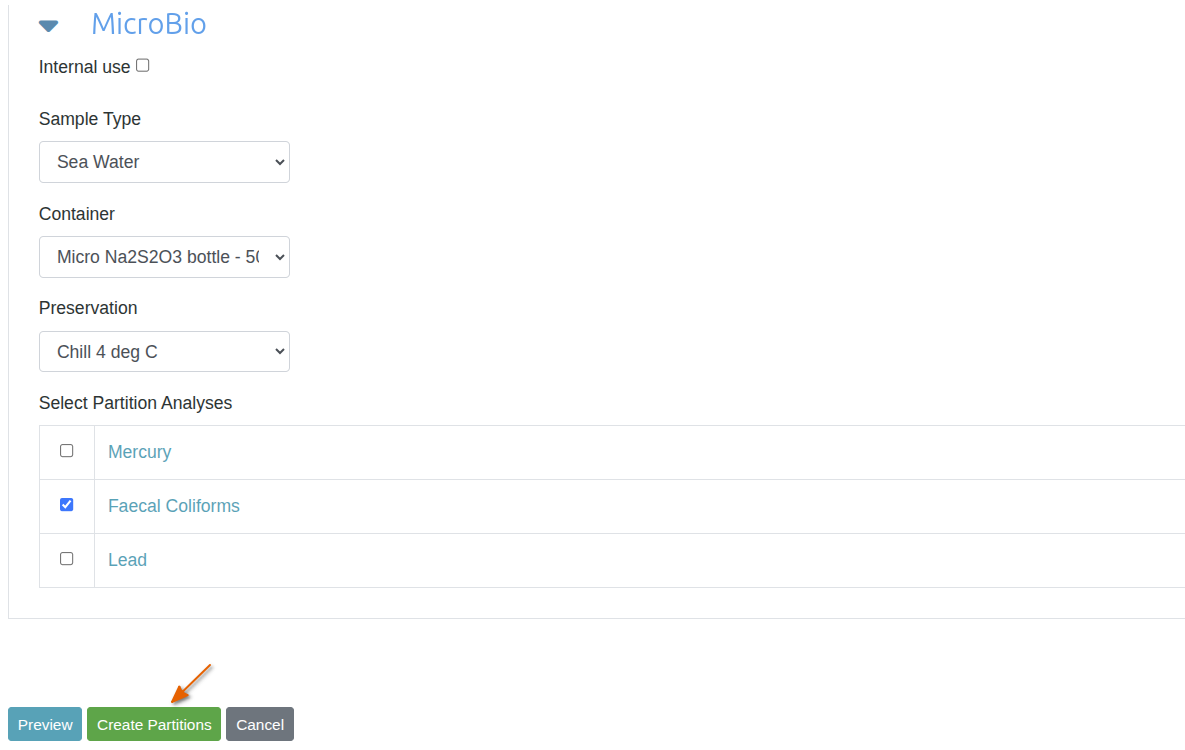
Partitioning
When the Sample is in Received state it can be partitioned. Select the Sample on a list and click [Create Partitions]
If Auto-partition was selected, the Sample first view will automatically be the Partitioning page

Or from the state drop-down on the Sample view

The partition preview page opens, where they can be previewed. Once they built enough trust in Bika, users will simply press [Create Partitions]