We are using the online Template here, make a copy for yourself
The first sheet, Import, must be populated and exported as CSV. The others are used for lookups and must be populated with exact values from the LIMS
Preparing the CSV
To speed up spreadsheet completion, secondary lookup sheets with data from the LIMS for Clients, Contacts, Sample Points and Sample Types, Profiles, Analysis Services etc. are available
They are used for validation lookups on the first sheet to ensure correct entries, literally like that on the DB, are captured
In this tutorial we are using the following values, they have to be in the LIMS
Sampler Sam Sampler
Sample Type Swab
Analysis Specification Cheese preparation
Sample Condition Good
Lookups
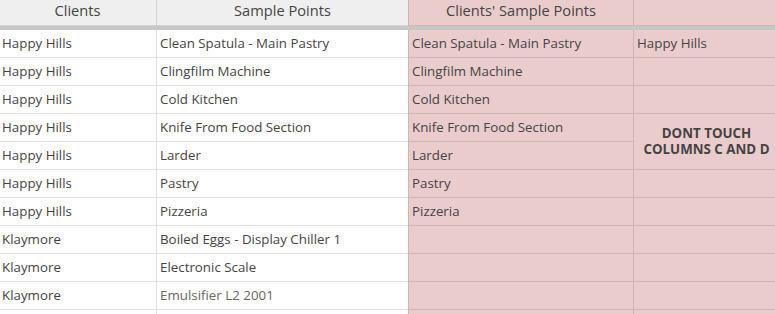
For the Client Sample Point and Contact lookups to work, note the areas shaded red on the Client Contacts and Sample Points sheets - they contain formulas to lookup the correct ones per Client and is best left untouched. Populate only the unshaded cells
In this tutorial we use Client Happy Hills and its Sample Points Clean Spatula - Main Pastry, Clingfilm Machine, Cold Kitchen,Knife From Food Section, Larder, Pastry and Pizzeria
Client and Batch
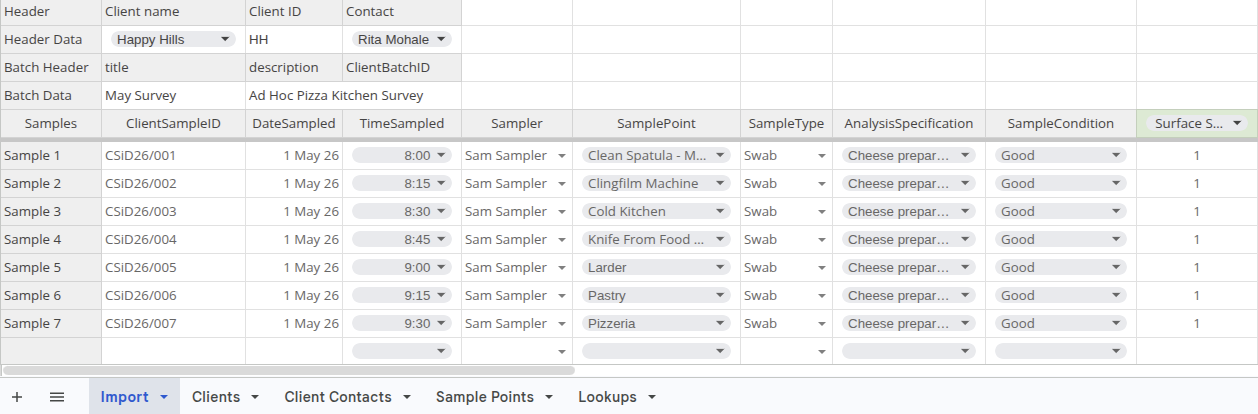
The first rows are for the Client and its Contact for which the Batch of imported Samples must be created. If it is a new Batch, provide a title and description for it
If the Samples are to be added to an existing Batch, provide the title and Client Batch ID for it
In the tutorial we use the Happy Hills Client, Rita Mohale as Contact and a New Batch, May Survey with description Ad Hoc Pizza Kitchen Survey
The Samples
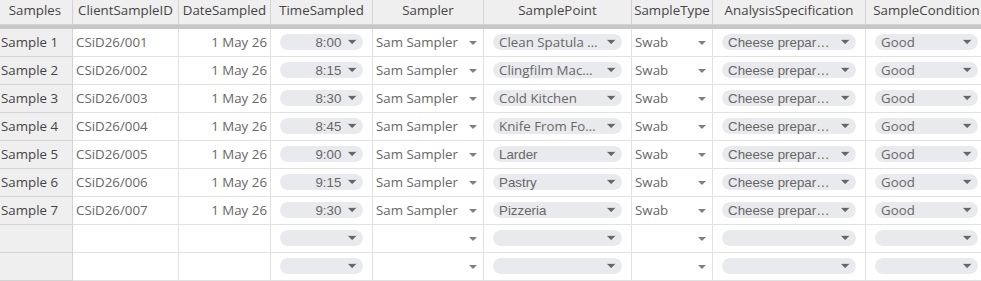
Then proceed with all the information per Sample in the table below the header, 1 row per Sample, Client Sample ID, Date and Time Sampled, Sampler, Sample Point, Sample Type
NB Column A on the Sample rows must be maintained
E.g. Sample 1, Sample 2, ... If empty the import will fail. At the end of the samples, leave all rows empty
Analysis Profiles and Services
In the last columns, complete the header row with the Analysis Profiles and individual Analyses that can be requested. Check the cells corresponding to the Sample ID with a '1' to include the columns Analysis or Profile in the Samples' registration. here we request the Surface Swab profile for all the Samples
Save the Import sheet as CSV, and proceed to import it
Save the Import sheet as CSV
Only the Import sheet is necessary - save it as CSV from your spreadsheet program
For the tutorial here we use the clumsily titled Bulk Sample Import 3 for Tutorial - Import (2).csv
Load the CSV
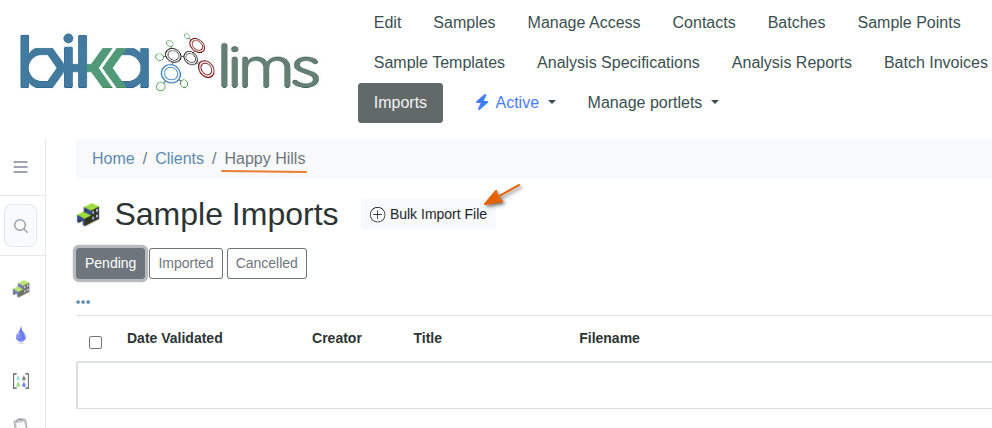
Navigate to Happy Hills' Imports page, all the Client's previous Imports are listed in states of Pending, Imported and Cancelled
Click [Bulk Import File]. On the next screen browse to the CSV using the standard browser widget and click import
CSV Validation
It takes seconds for the system to upload and validate the file entries
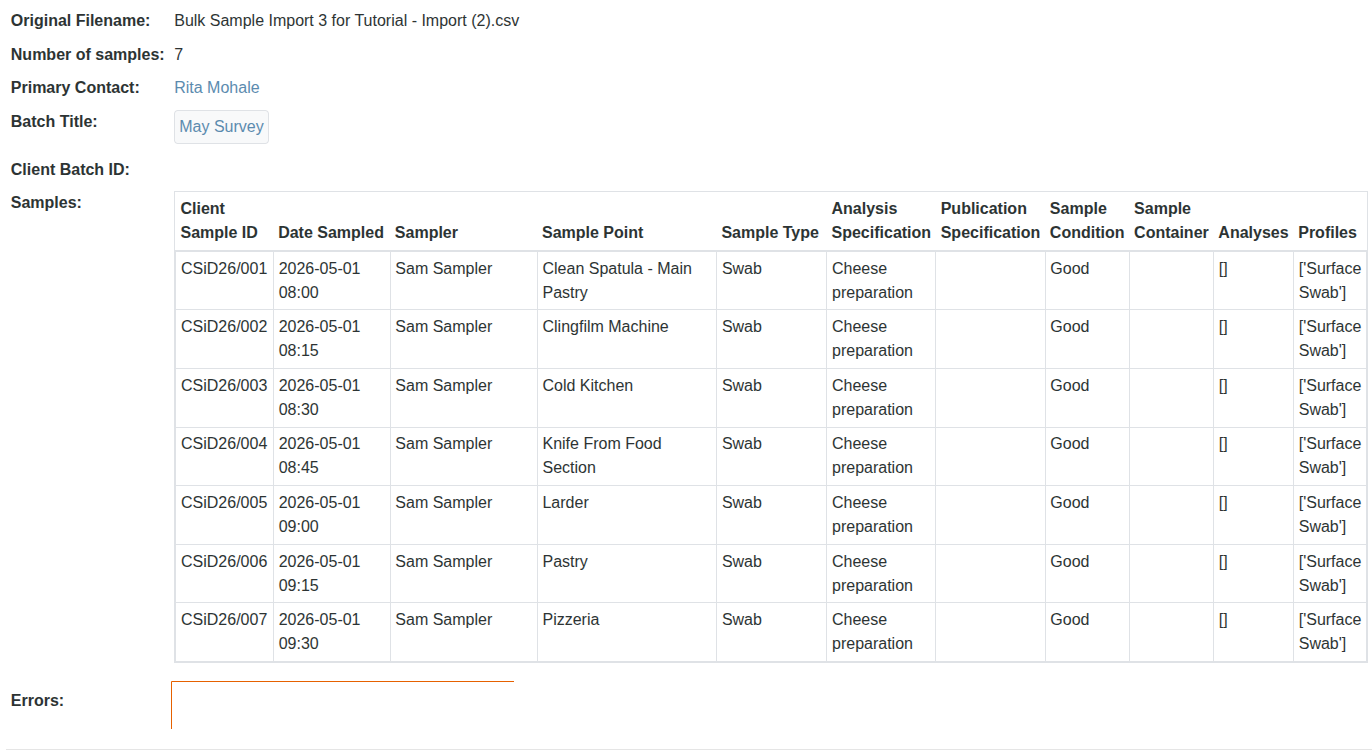
After loading the CSV, the new Import's page opens. See if any errors were found - they will be reported in the bottom row
Validation failure
If there is an issue with CSV and it does not validate, the Import pages will load with an Invalid state, and the reason given in the error message line at the bottom of the page
In this case I caused the error with an invalid Sample Point, Serving Counter, not found in LIMS. Cancel the Import: select the Import and press [Cancel]. Go Back to the spreadsheet, fix it and re-import
Import
If there were no errors, click Import on the Import's state dropdown
The importation takes a bit longer than the validation step
When done, a confirmation message is displayed on the Import's page, now in state Imported
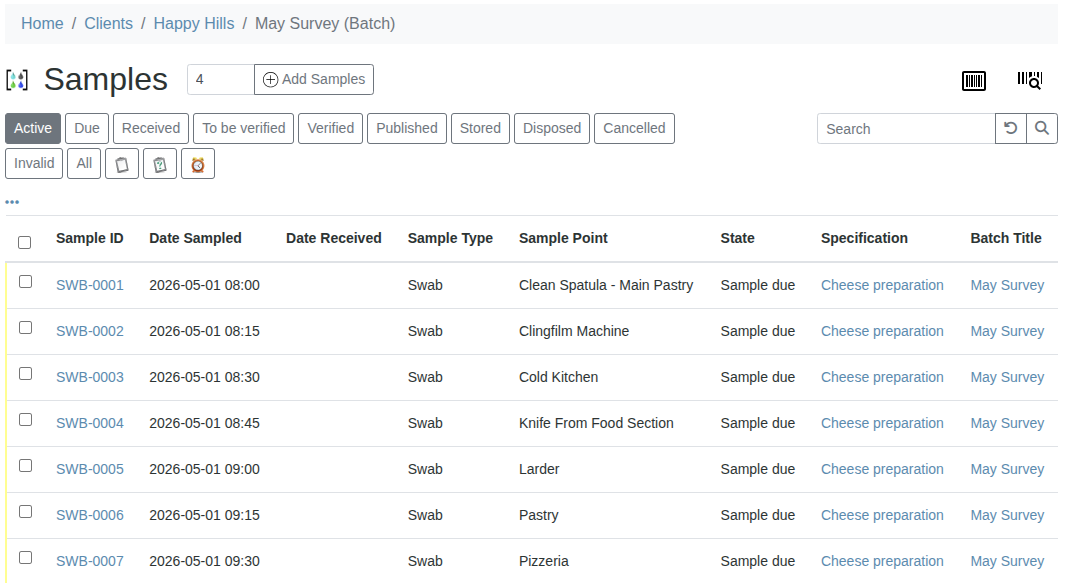
Success. Proceed with Workflow
Click on the Batch title to navigate to the new Batch from where the Samples can be taken up into the lab's workflow